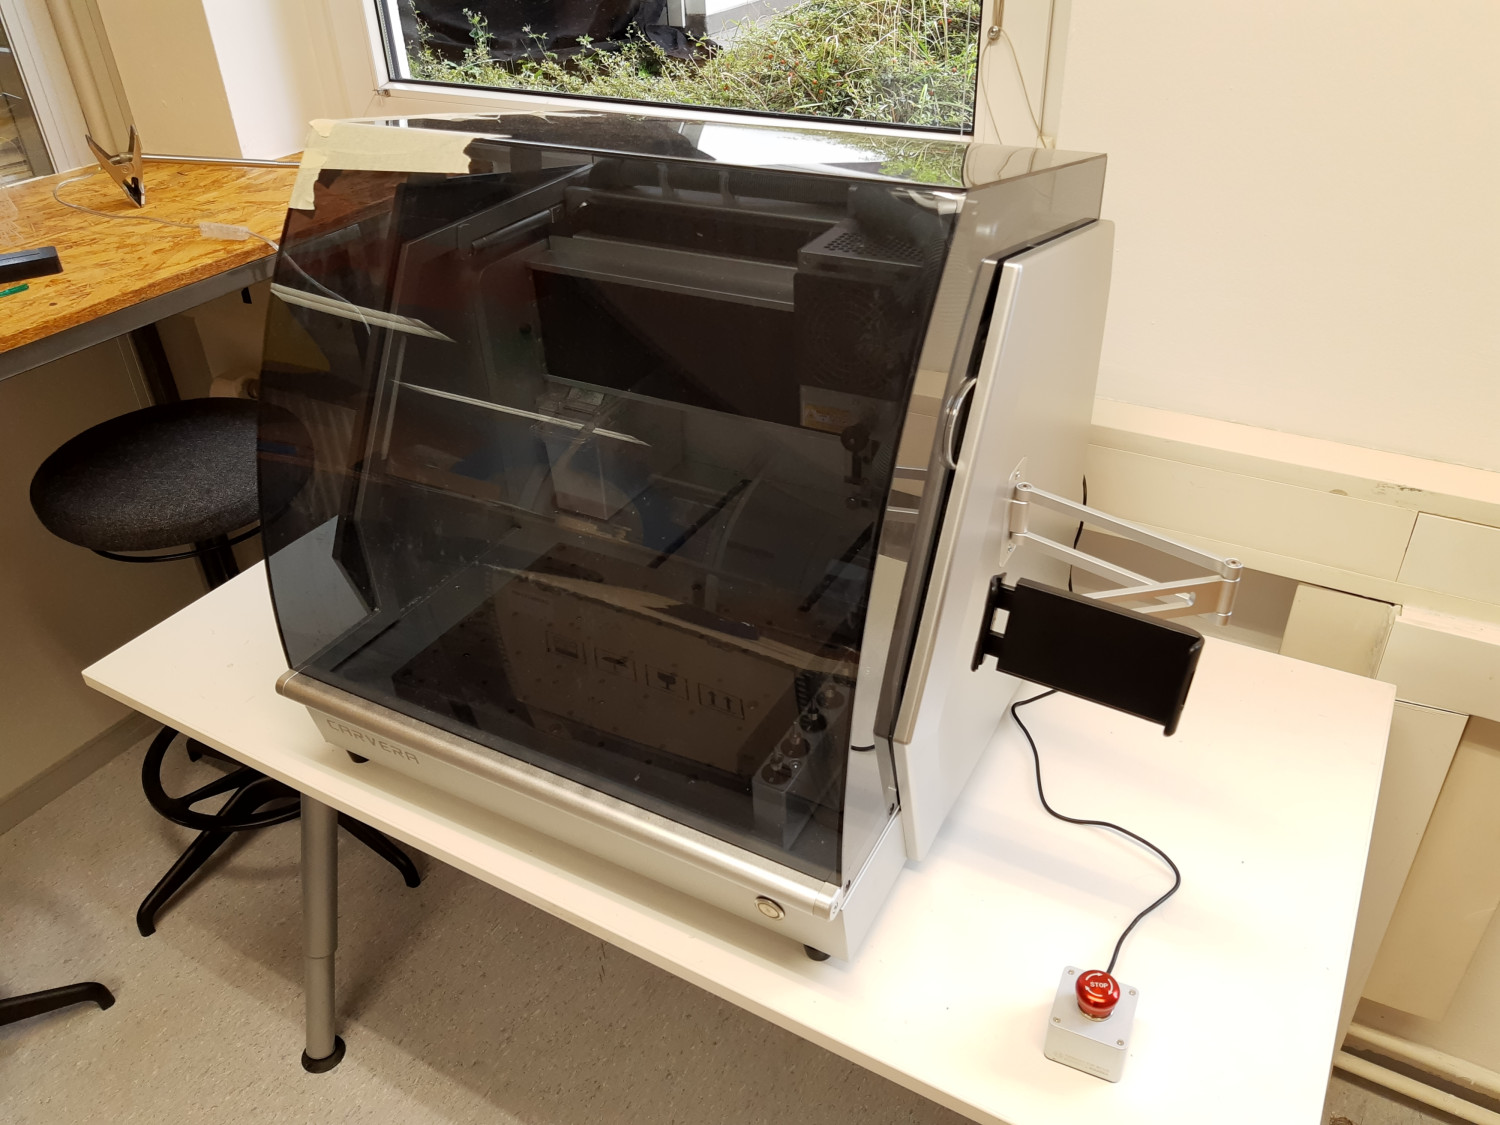
Happylab has a new machine: After a long wait, our Makera Carvera milling machine has finally arrived in April 2023!
At the beginning of 2021 we supported a Kickstarter campaign for a desktop milling machine, which should be very precise and easy to use. At that time, we were thinking about how to make PCBs at Happylab without etching - a precise and small CNC router seemed perfect for this! Makera was not quite able to meet the planned delivery date of August 2022, but the Carvera arrived at Happylab in April 2023.
Unfortunately, the cover broke during transport, but a replacement is already on its way. Despite the damage, we have already been able to test the machine and are in the process of developing a workflow for PCB production.
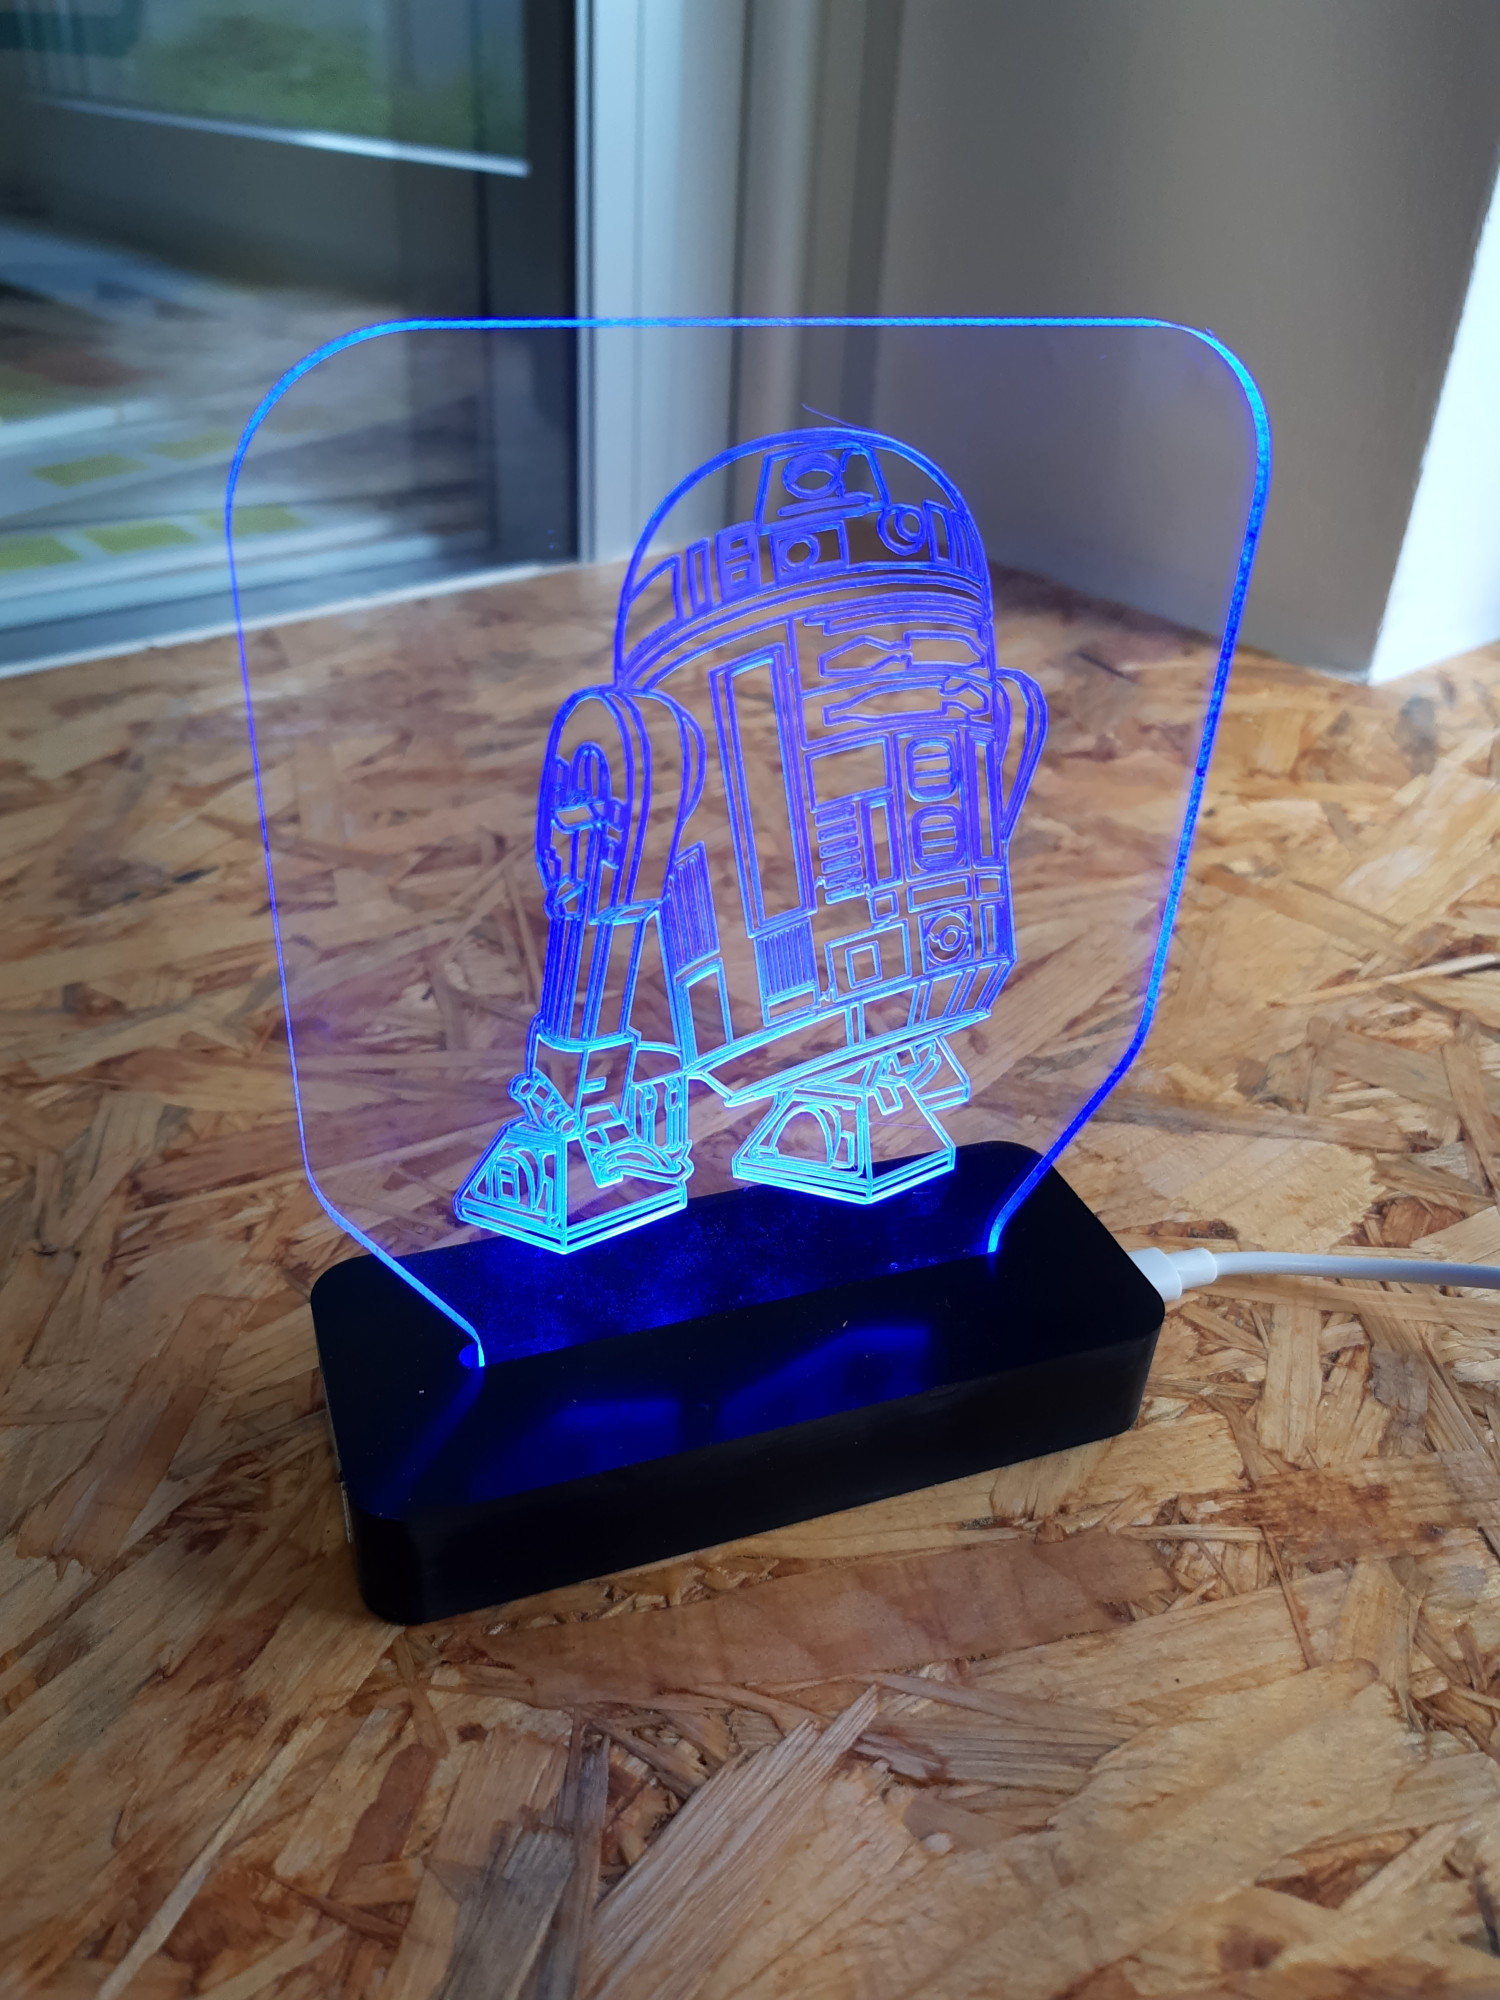
Makera provides four sample projects along with the router, including materials, finished G-code and instructions to get started quickly and demonstrate the capabilities of the device. The sample projects are: an LED light, a laser engraving, a 3-axis relief and a 4-axis relief.
Technical details
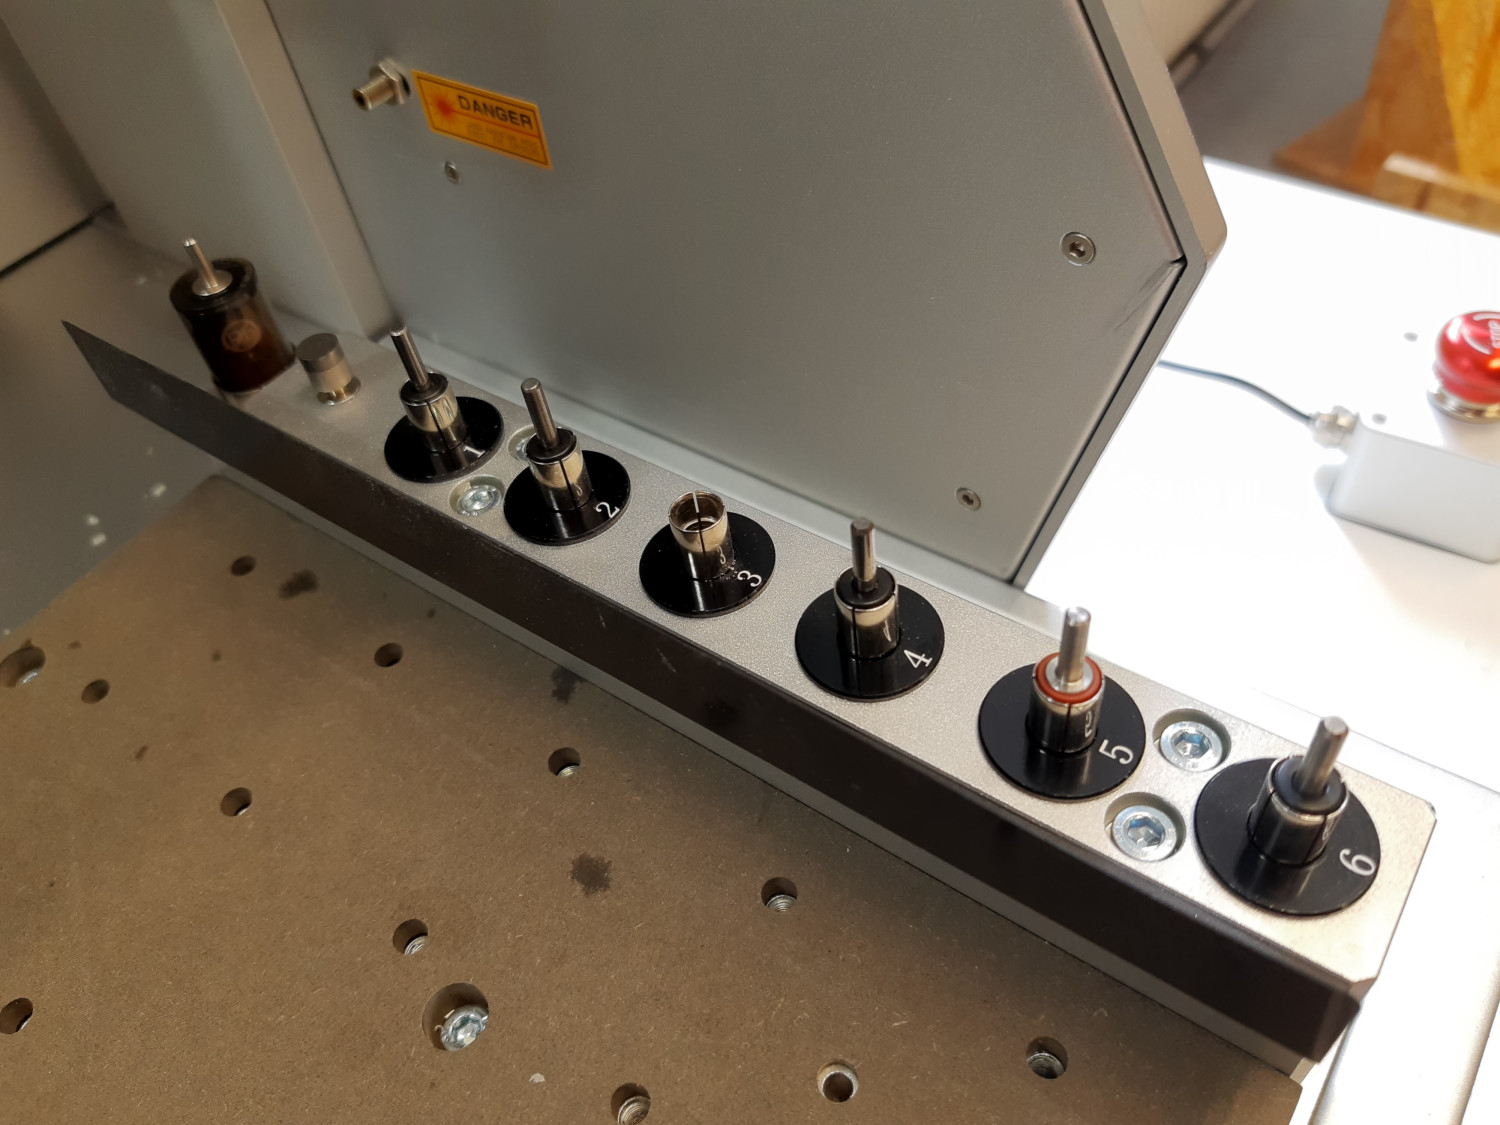
First of all, the technical stuff: The Carvera comes with an automatic tool changer with 6 slots plus a slot for the wireless probe. With this probe, the Z-zero is automatically measured, as well as an automatic leveling if needed. It has a working area of 36x24x14cm with 3-axis and 9.2x24cm (diameter x length) with 4-axis. According to the manufacturer, it comes up to 0.05mm accuracy. In addition, a 2.5 watt diode laser is built in to engrave materials.
What can the Carvera do?
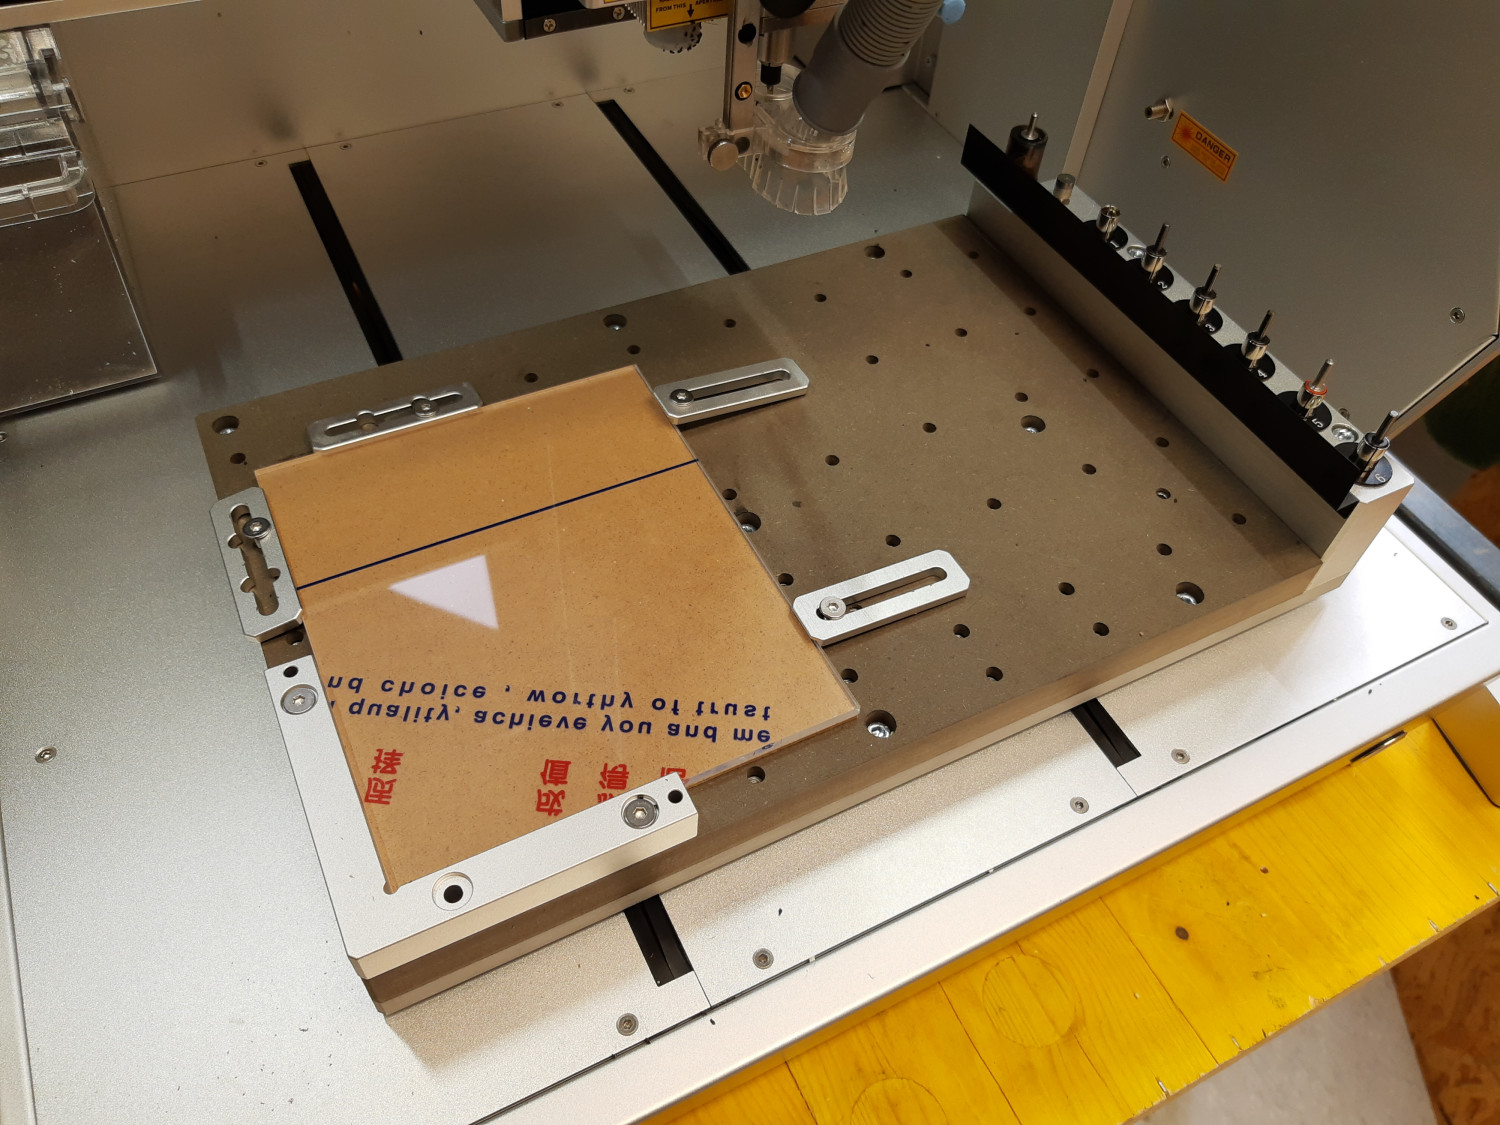
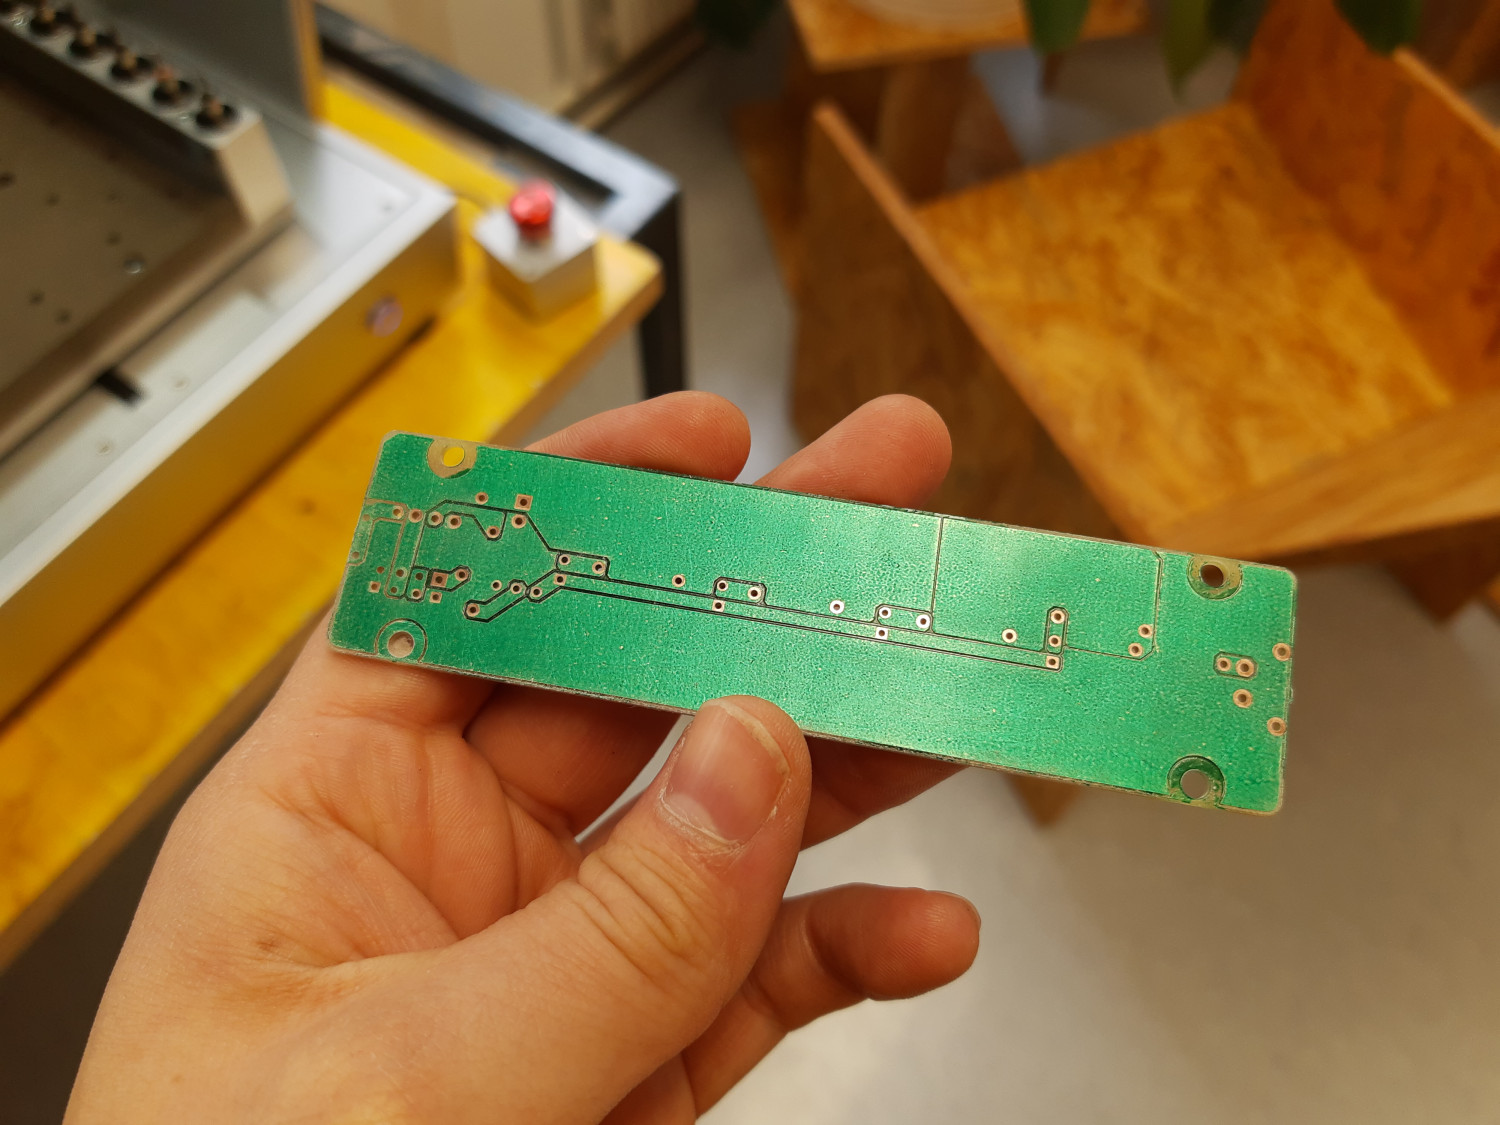
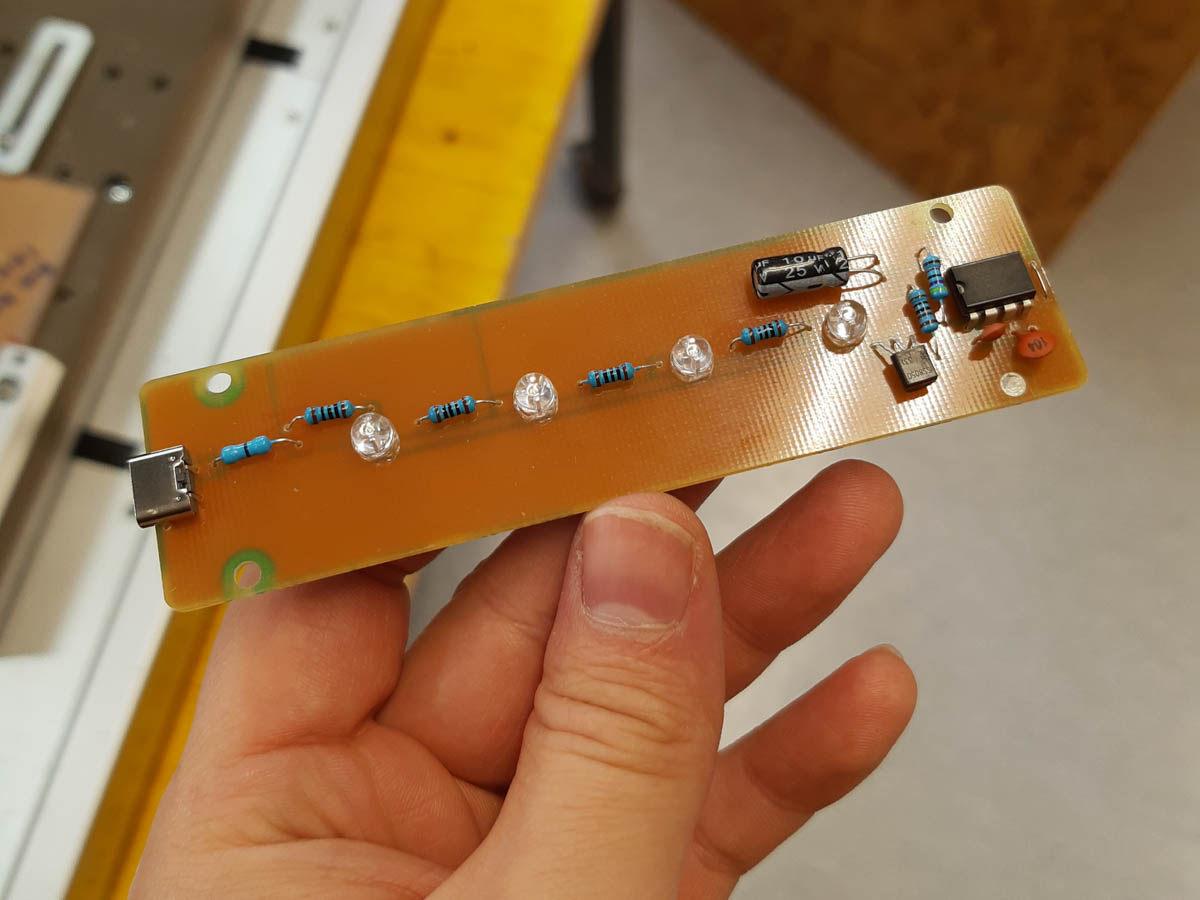
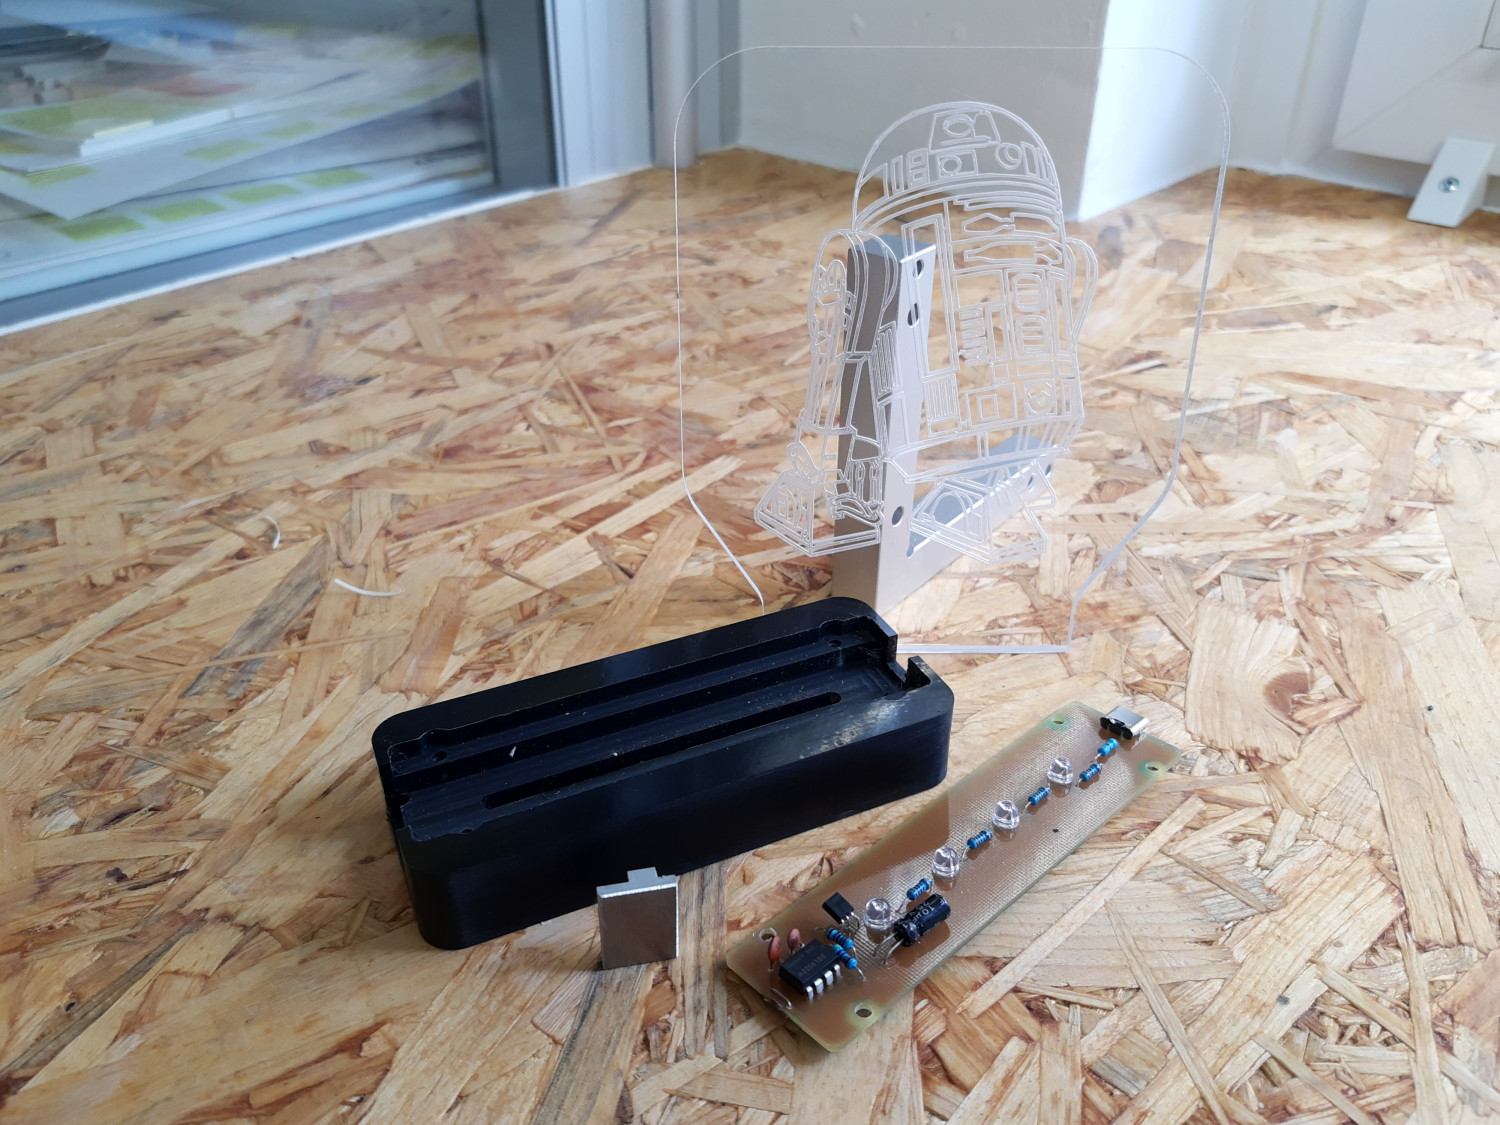
A great example was the LED light, for this I first milled the board for it, then applied solder resist and cured it with UV light. Now the varnish is removed with a fine milling cutter on the pads. The result was already quite good, only in one corner I had to scrape off the varnish manually. The components were also supplied, so I could also equip the board immediately.
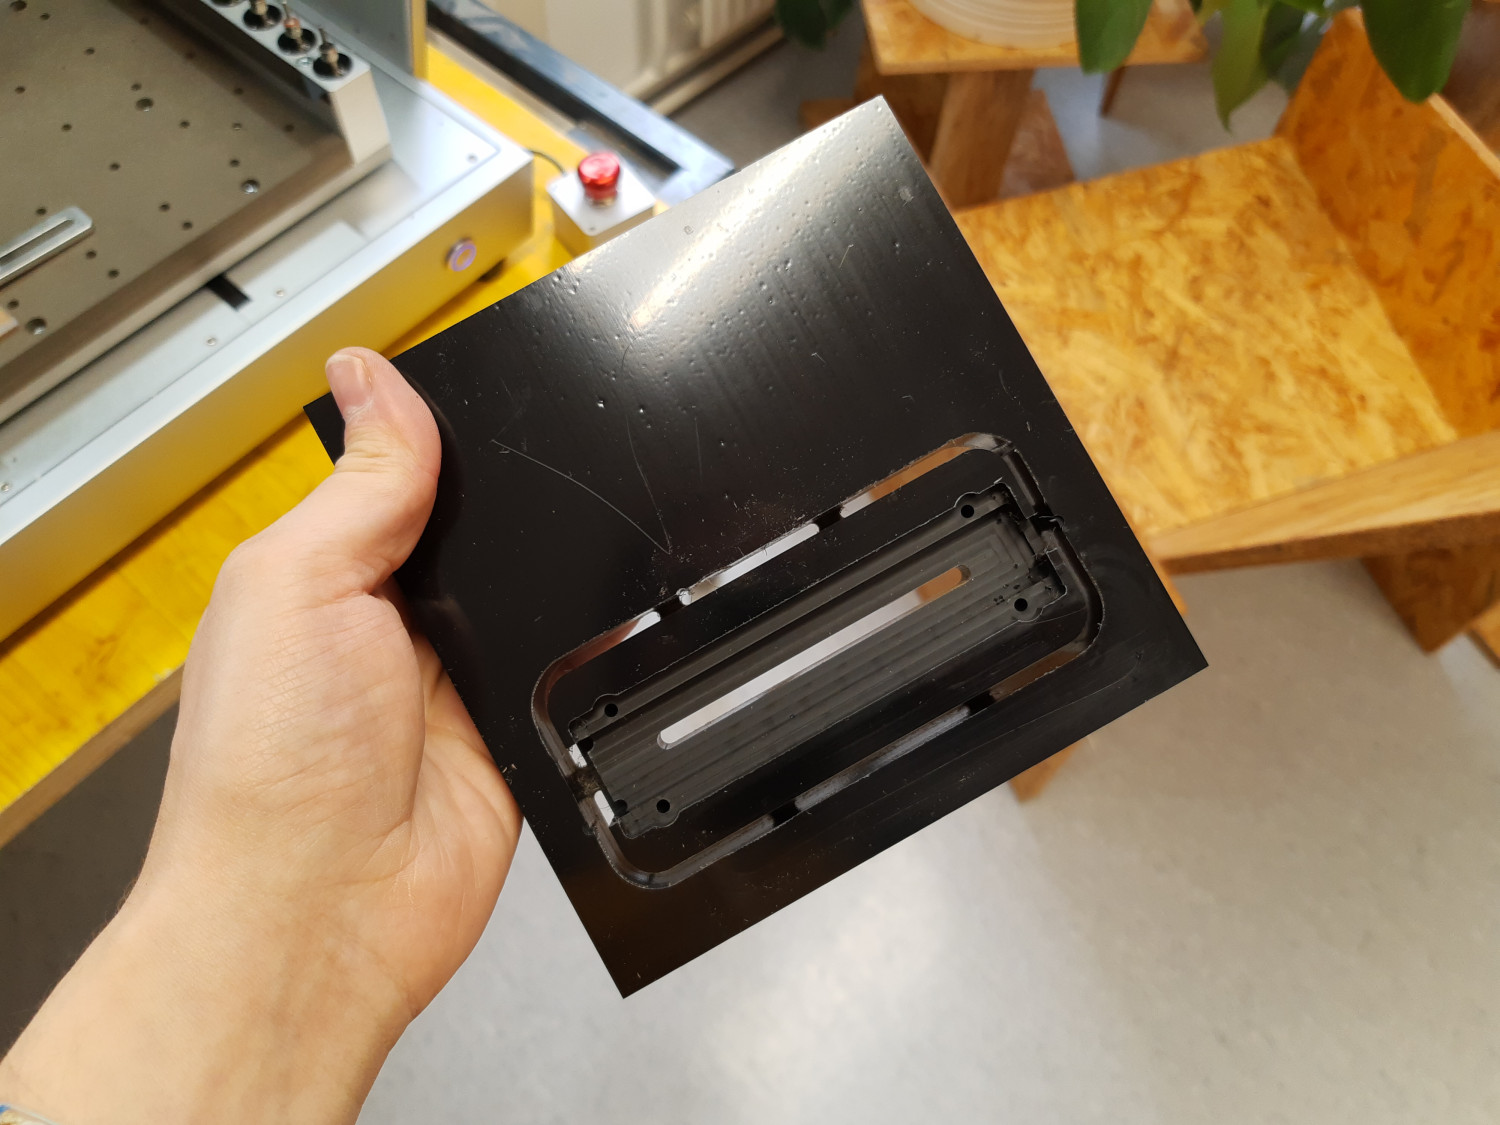
Now the base is milled from an ABS block. The circuit board has an open contact on one side, on which an aluminum plate will later press to act as a touch switch. This aluminum plate is also made in the Carvera.
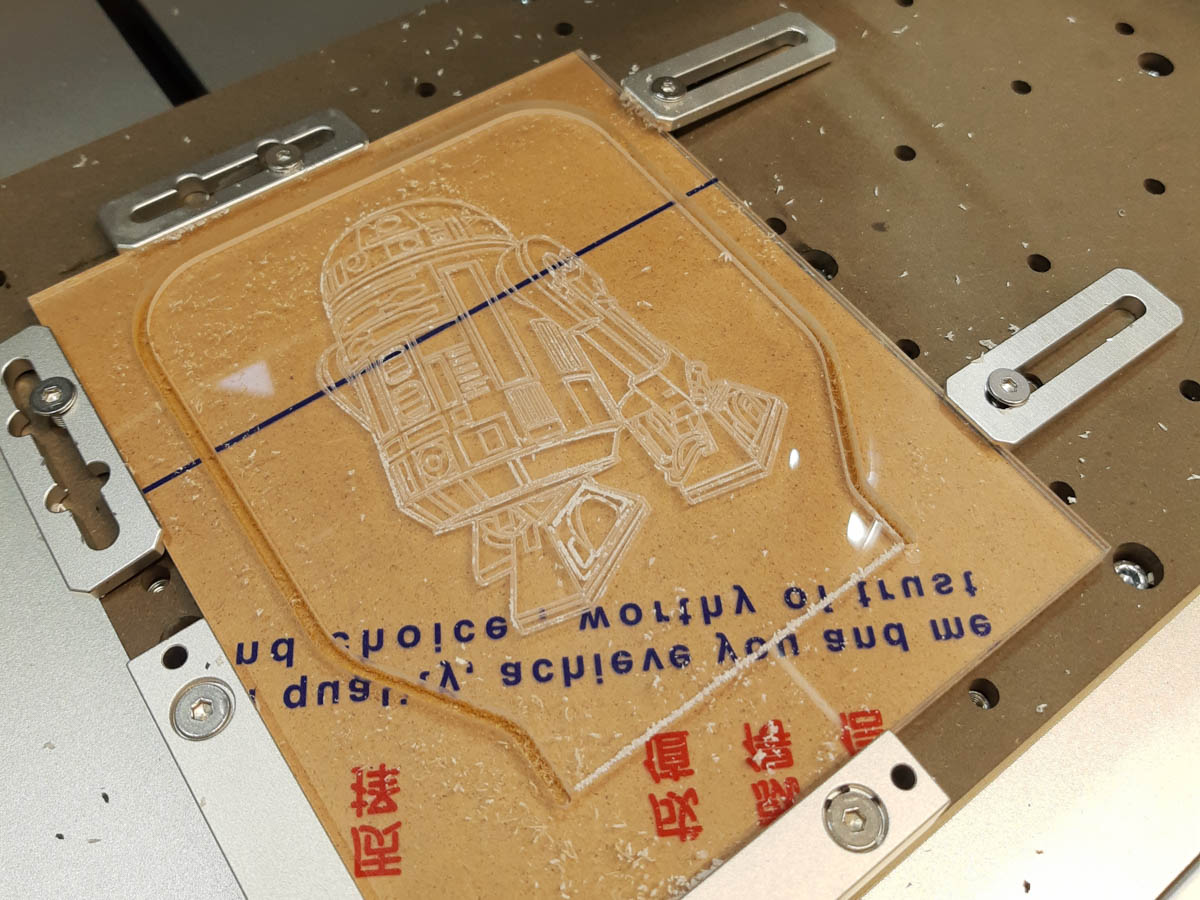
The last step is to engrave and cut out the acrylic glass. Makera even provides several different motifs for this. First, the motif is engraved with a V-bit and then cut out with the 3mm cutter. The breaking edge at the lower end is then scribed with the V-bit, so that the sign can then be nicely broken out of the material. Finally, the light must only be assembled.
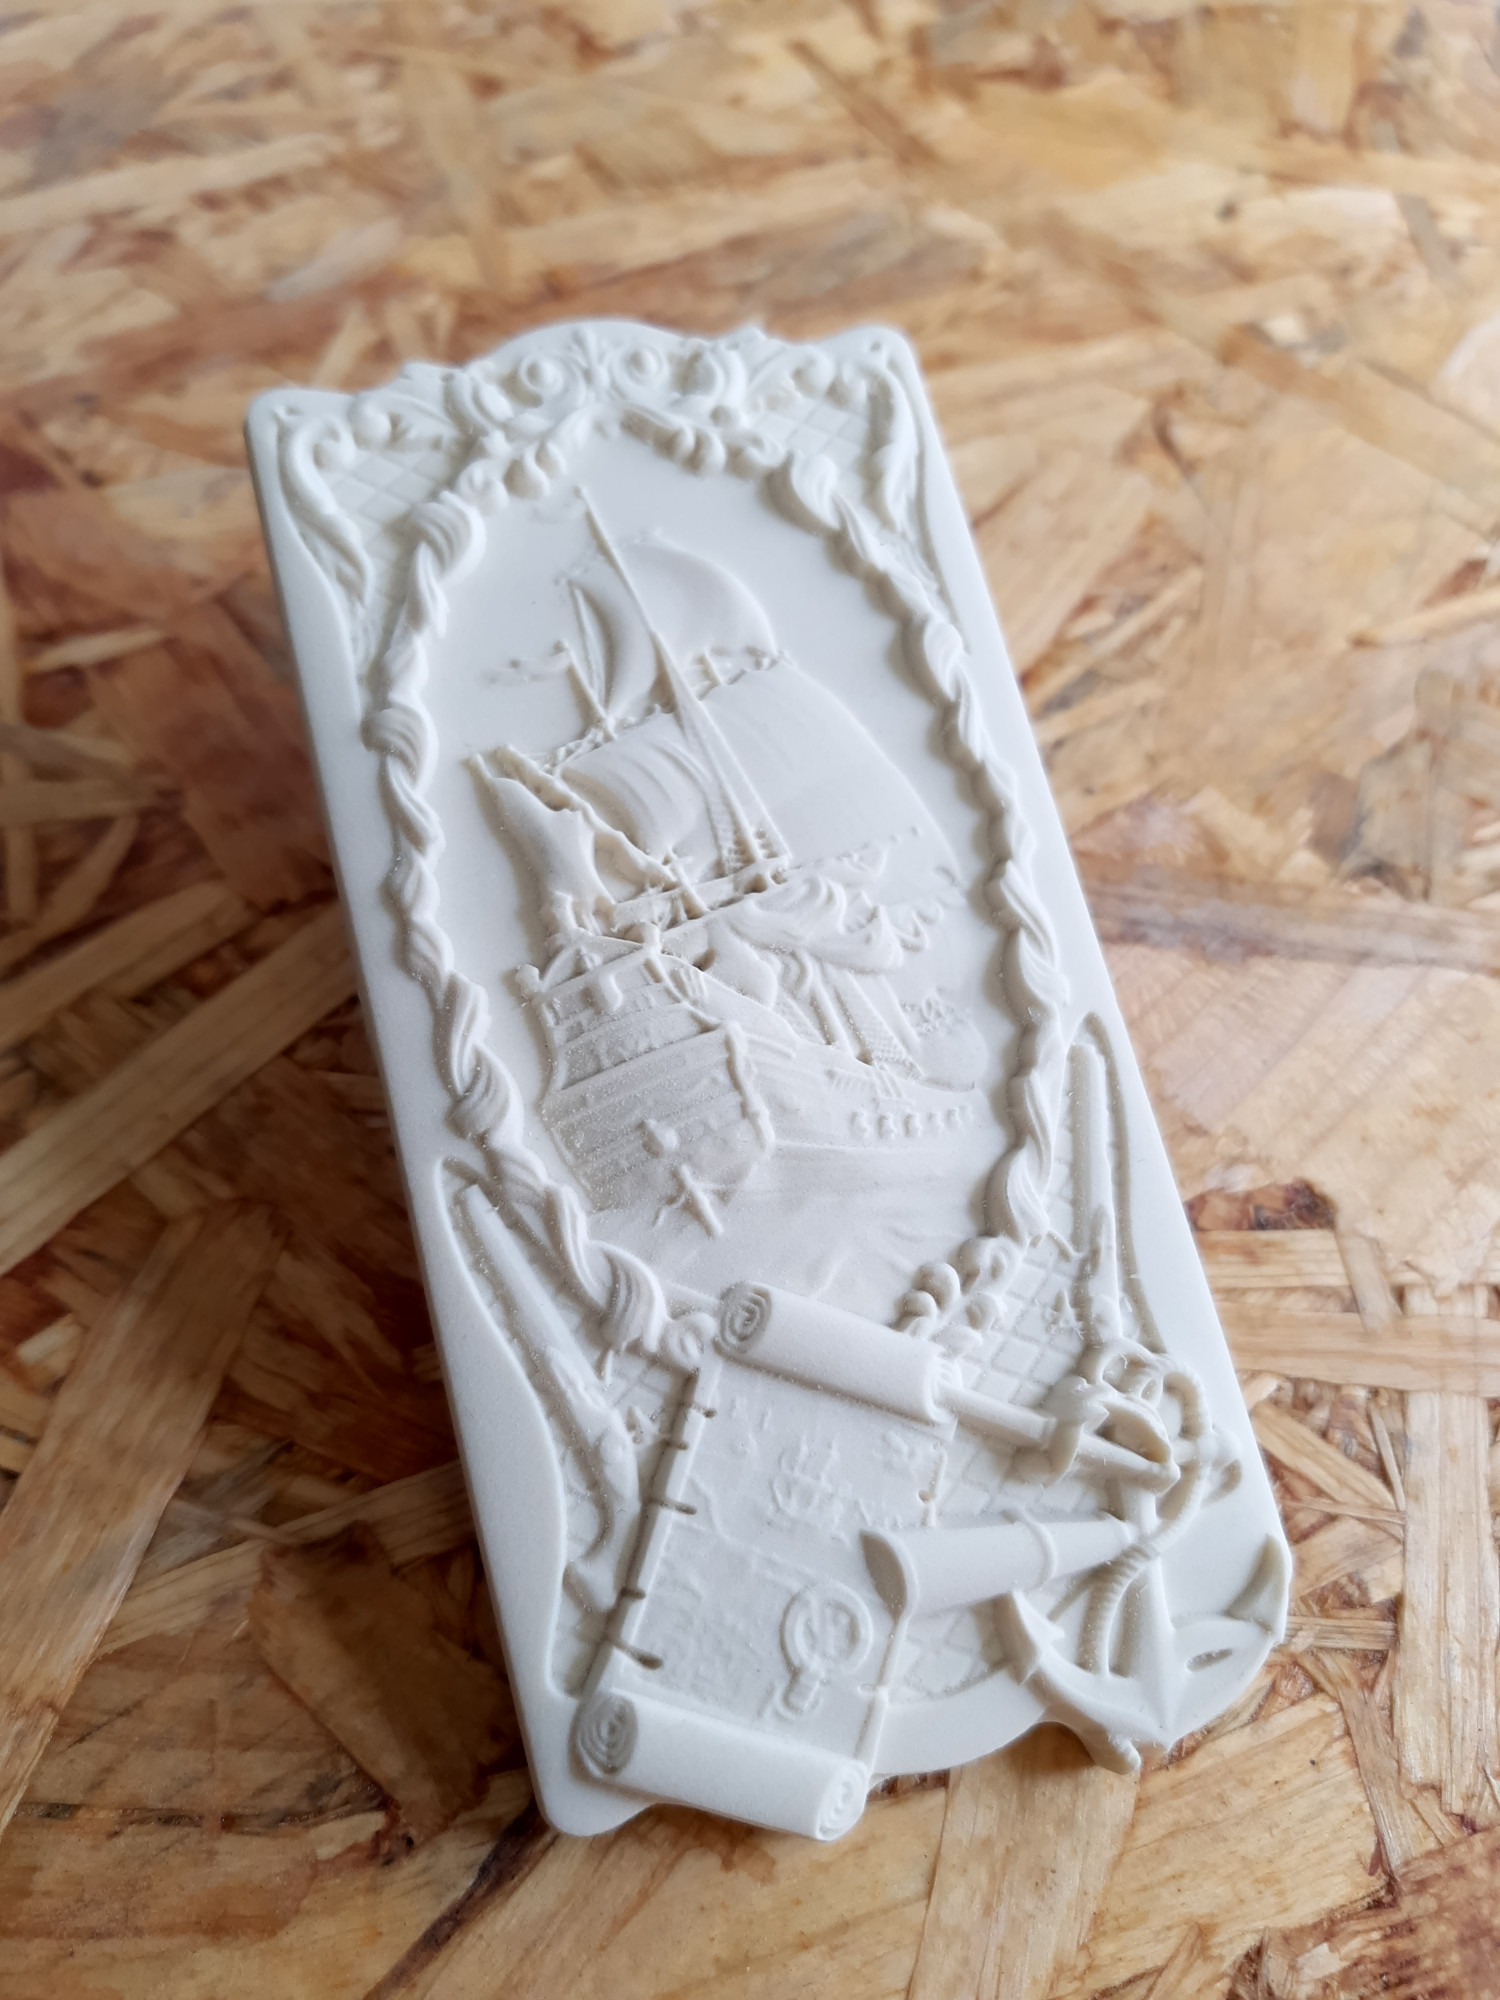
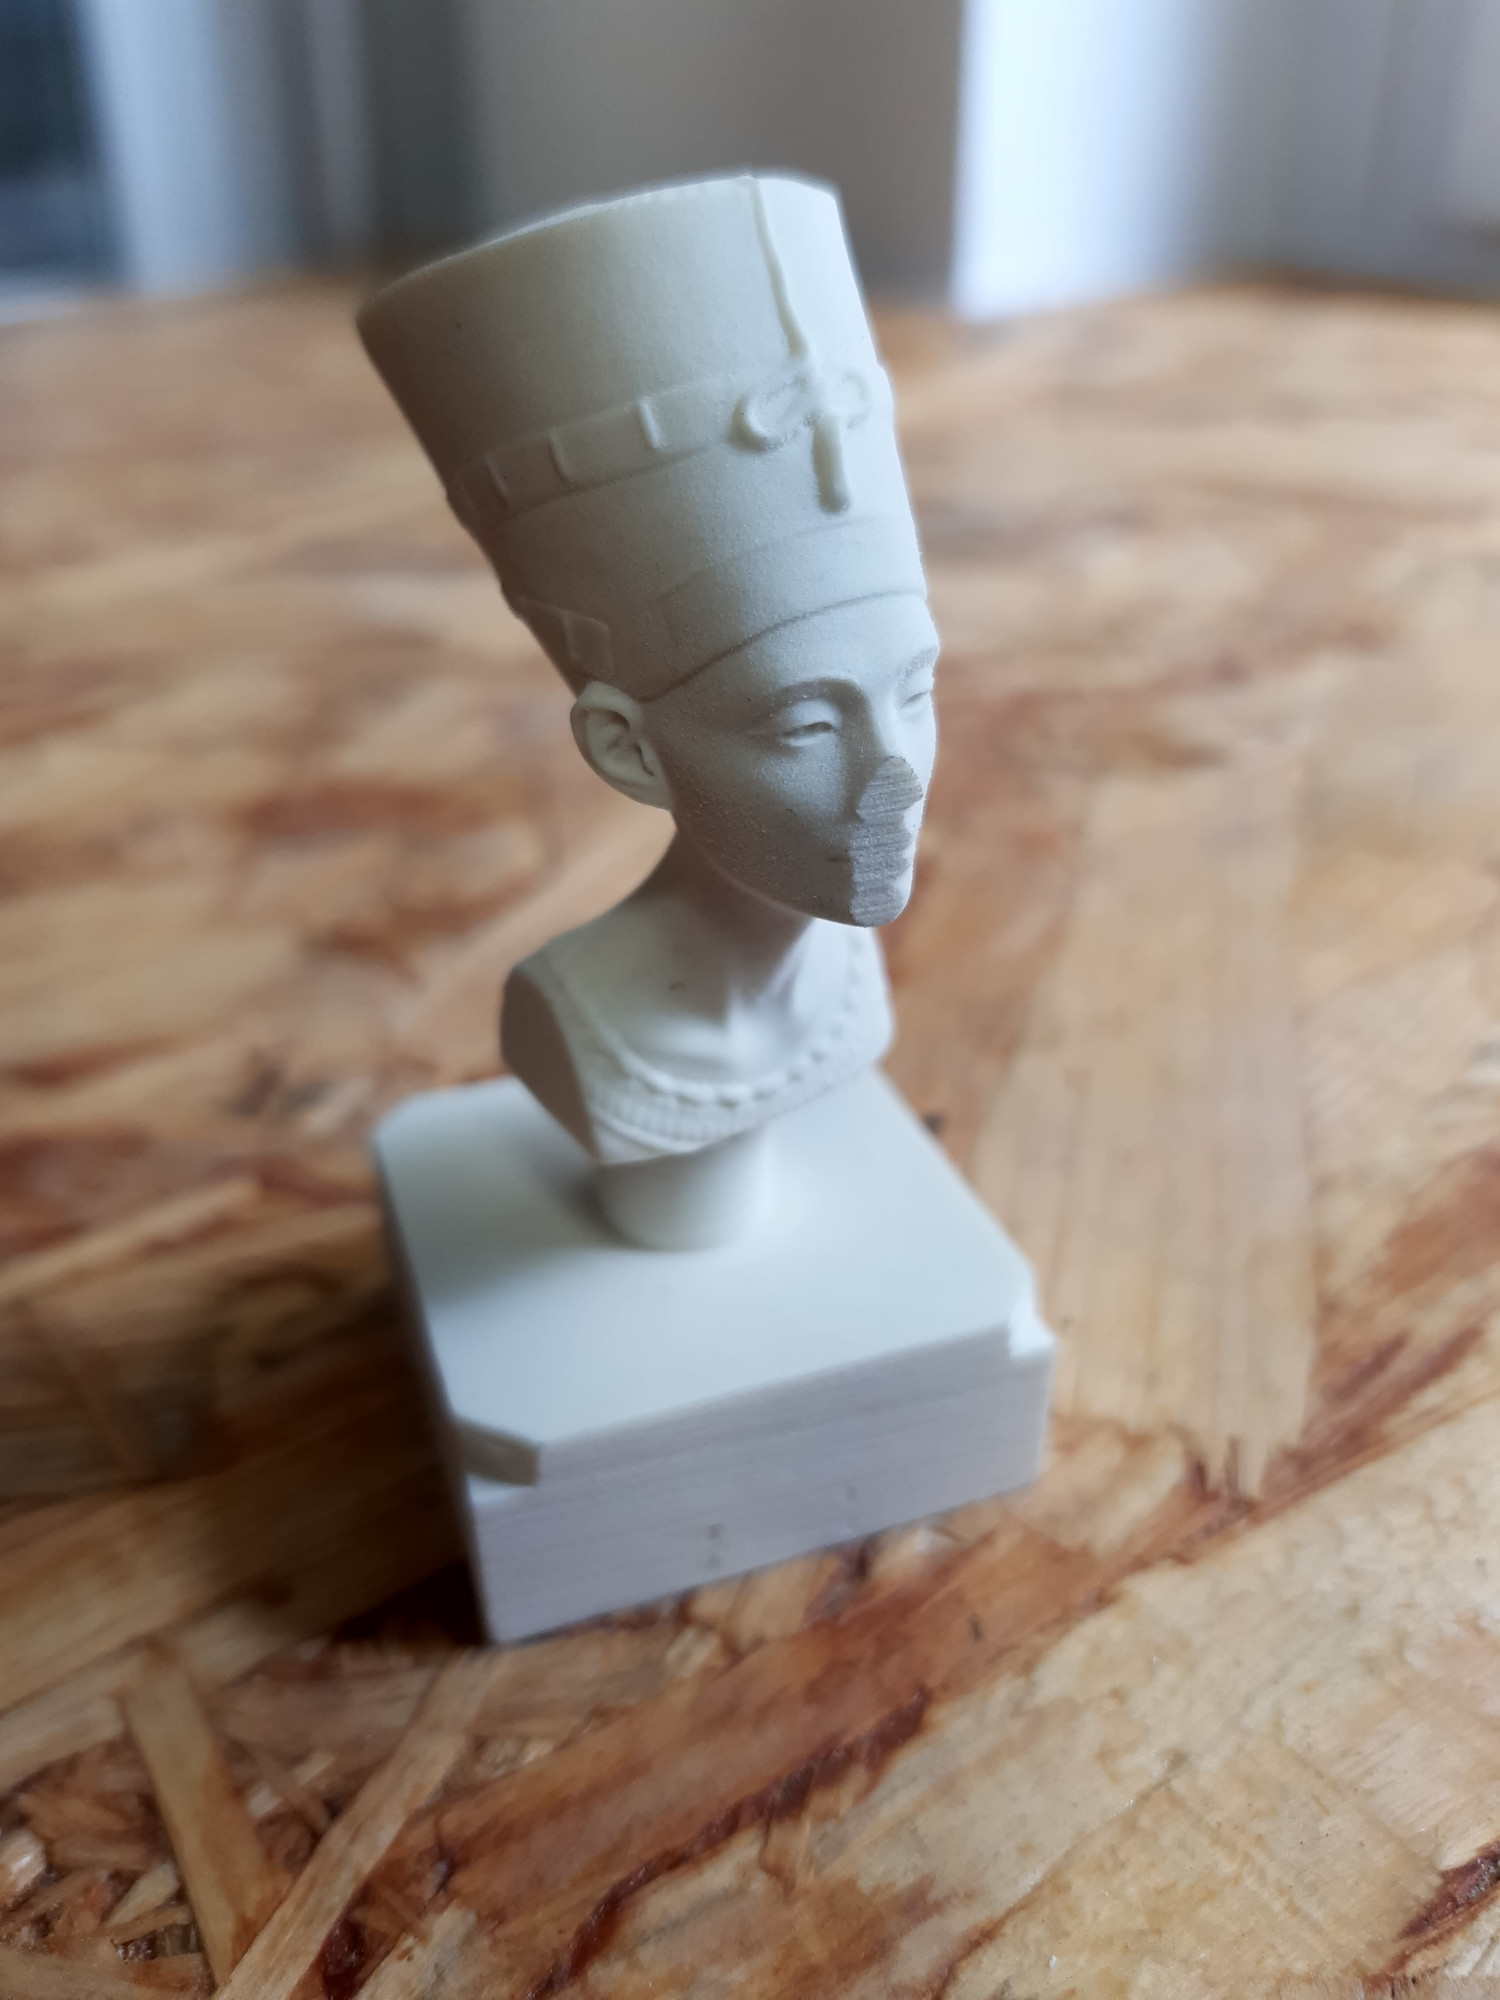
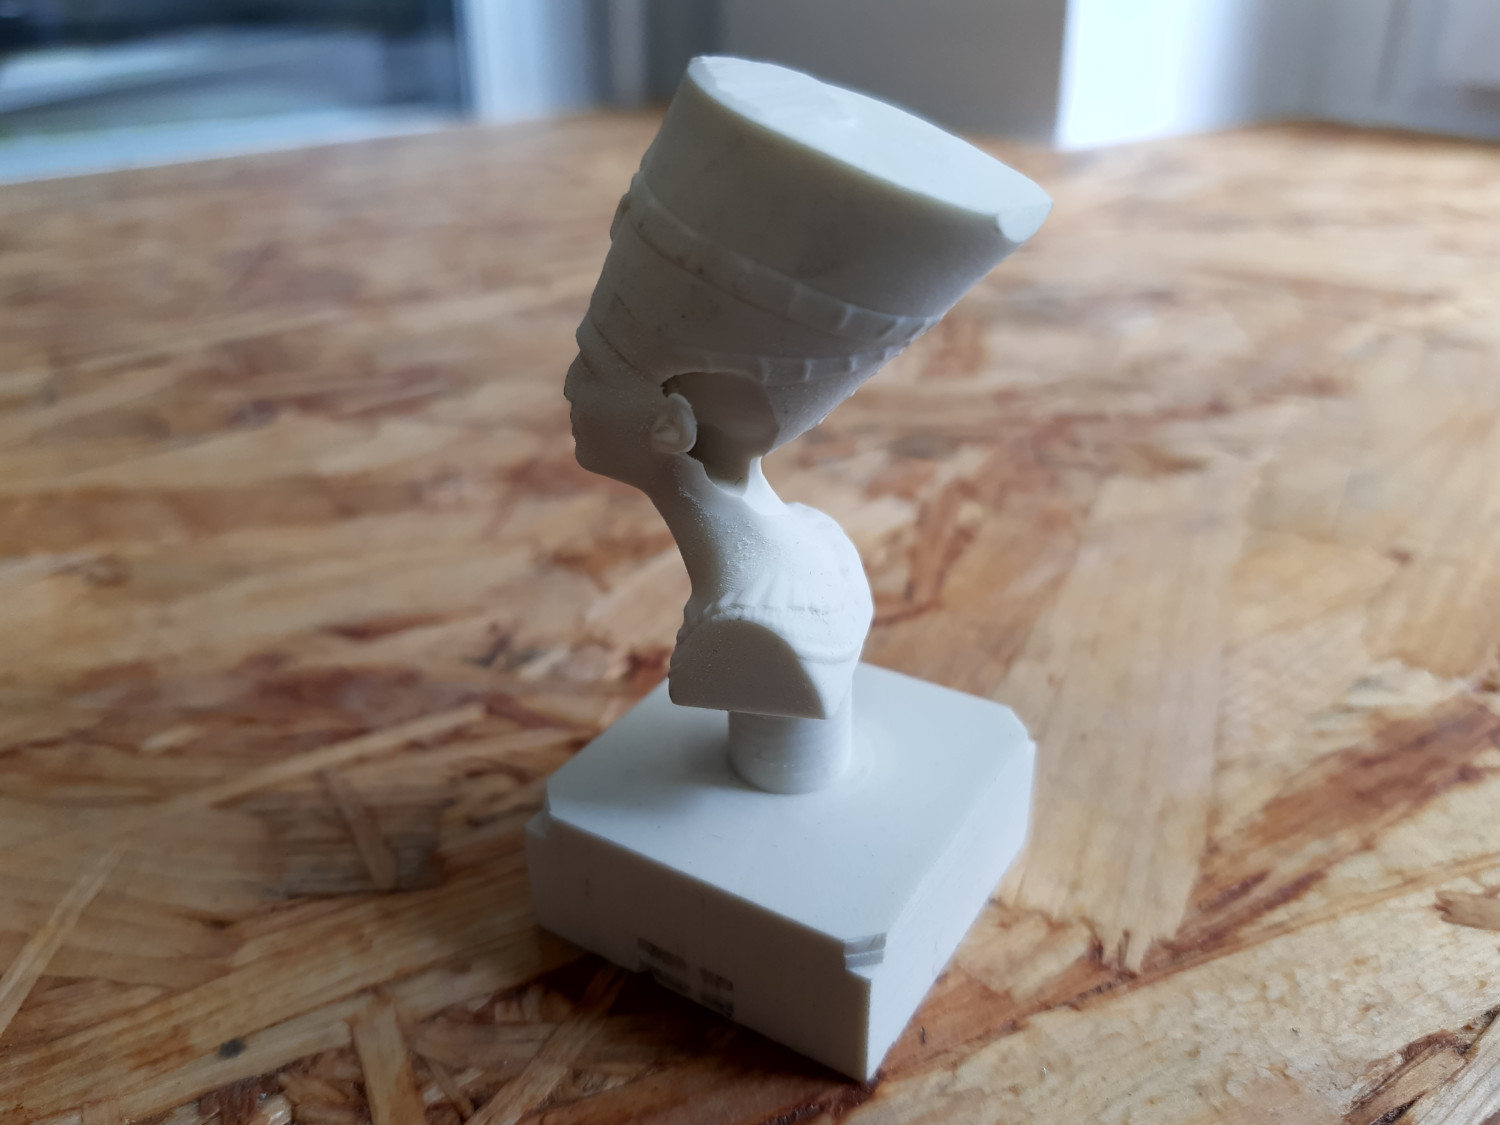
A second great example was the 4-axis relief. For this, the 4th axis is mounted on the bed and the enclosed material is clamped. Then first, in a roughing process, material is roughly removed. Then the milling machine pauses for a short cleaning. With the 4th axis, the dust collector must be removed and the suction deactivated, otherwise it will get caught.
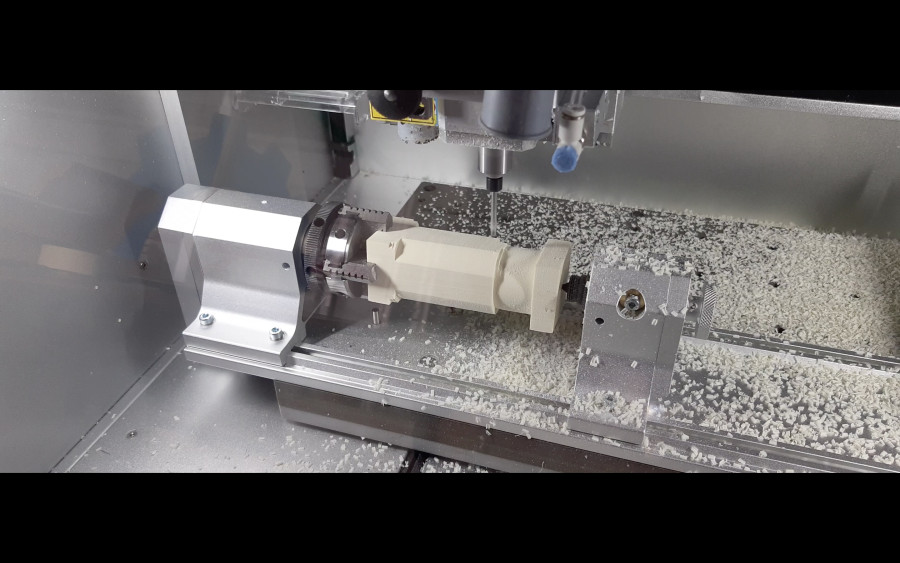

Now the finishing process is started and the statue is finely carved out. Unfortunately, there was an error in the G-code, which caused a hole to be milled behind the ear. Likewise, the blank is a bit too small for the model, resulting in a flat nose, ears and back of the head. That said, it's impressive how detailed the bust became and watching the 4th axis work has something hypnotic about it.
Conclusion and what's next?
So with the included examples and the finished G-code, the Carvera already shows impressively what is possible with it and how detailed the results can be.
However, it is not yet plug'n'play for own objects, especially the circuit board production still needs further tests. Therefore, it will take some time until the Carvera is available for you. But then we will have a precise small milling machine atHappylab, which is versatile and will be a great possibility for prototyping in the electronic field!